
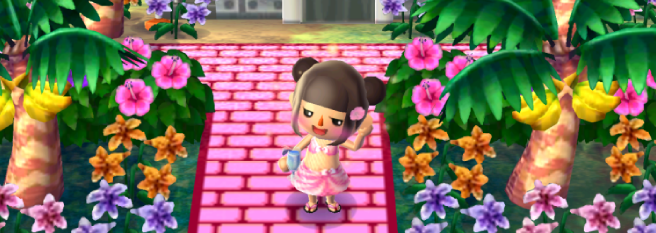
I wanted to post another tutorial guide onto AC:NL modding but this time based around making a new custom hairstyle mod! There aren’t any tutorials for this sorta stuff online so I wanted to share how I do it on my website for those who want to dip their feet into trying to make their own custom hairstyle mods too!
For this guide you can click to enlarge images as the text may be hard to read references images.
You can use this guide for any custom 3D mod for AC:NL too as it’s pretty much the same sorta process which may be helpful!
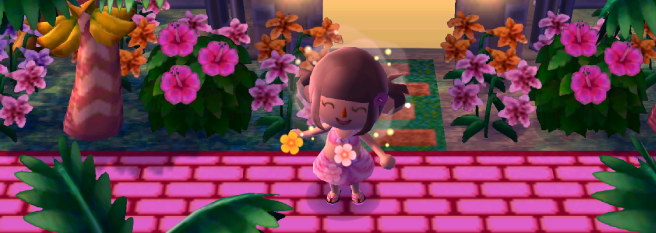
What You’ll Need
Firstly, you’ll need a modded console and/or an emulator with a ROM of AC:NLWA to actually use your own mods and test if they’re running – but if you’re reading this guide then I’m obviously assuming you have this already.
You’ll also need a PC with CTRStudio installed. You can use other applications to edit texture files like OhanaRebirth for example, but for this guide we will be sticking to CTRStudio as it’s a very powerful editing tool for the 3DS.
You will need NET 6 installed on your PC as well, this is required as CTRStudio uses it to run.
In addition to that, you’ll need an older version of Blender that supports .dae exports. I use Blender version 4.5. LTS.
You’ll also need AC:NL dumped RomFS but don’t worry, I’ll be sharing how to do this in this guide. If you’re using my method to dump RomFS you’ll need to have Citra/Azahar on your computer with a ROM of Animal Crossing: New Leaf.

How to Dump RomFS in Citra/Azahar
Open Citra/Azahar and right click on it and then click on dump ROMFS.

And you’re done after it’s finished dumping! It’s super easy to do using Citra. You can find your dumped RomFS folder via:
C:\Users\[your pc’s name]\AppData\Roaming\Azahar\Dump\romfs
To access AppData/Roaming do this: Windows key + R (at the same time), type in %AppData% and hit enter and then find the directory mentioned above.
What Do All of These Files Mean…?
There is a lot of folders inside the dumped RomFS folder, these are all neatly sorted into different things. In this tutorial we’ll be only based on making a custom hairstyle mod so we’ll only be looking inside of the romfs > Item > Model folder!
Wig Hairstyle Guide
You’re going to want to find a file for the item you want to replace/modify. For this tutorial I’ll be using the bun wig.
I’ve made a little cheatsheet guide on all of the wig files that you can use! These file names and IDs are based on the dumped romfs from an AC:NLWA ROM not the base game. The IDs mentioned next to the file name is used for vapecord for spawning them in, for example the bun wig’s ACNLWA ID is 2898 so you’ll use that to spawn it in.
• Afro wig – hlmt_wig_afro (ID: 2894)
• Black veil – hlmt_viel (ID: 28D5)
• Braided wig – hlmt_wig_braid (ID: 28E1)
• Bridal veil – hlmt_veil_wht (ID: 289A)
• Bun wig – hlmt_wig_dumpling (id: 2898)
• Flower fairy wig – hlmt_wig_panepon (ID: 28F0)
• Funky wig – hlmt_wig_mode (ID: 28C9)
• Geisha wig – hlmt_wig_geisha (ID: 2891)
• Hair-bow wig – hlmt_wig_ribbon (ID: 28CF)
• Kintaro wig – hlmt_wig_kintarou (ID: 28C5)
• Lottie’s bun – hlmt_wig_otg (ID: 28F3)*
• Marie wig – hlmt_wig_hotaru (ID: 28ED)*
• Matronly bun – hlmt_onion_hair (ID: 28D3)
• New hero wig – hlmt_wig_linkwild (ID: 28EB)*
• Ogre’s wig – hlmt_ogre (ID: 28D8)
• Pigtail – hlmt_pigtail (ID: 2897)
• Pompompurin hat – hlmt_wig_prin (ID: 28F2)*
• Powdered wig – hlmt_wig_powdered (ID: 2893)*
• Regent wig – hlmt_wig_regent (ID: 2895)
• Samurai wig – hlmt_wig_samurai (ID: 2890)
• Tiara hair – hlmt_wig_princess (ID: 2899)
• Topknot wig – hlmt_wig_ooichou (ID: 28CC)
• Zelda wig – hlmt_wig_zelda (ID: 28EA)*
• DJ cap – hlmt_headphone (ID: 28CD)
Some of these wigs have their own colour to them, for example the Pompompurin hat wig will always be coloured yellow despite the player hair colour being a different hair colour – like black. Wigs that use their own colour and are not player in-game colour compatible will have an asterisk next to them.
The powered wig might not be able to be coloured to any other colour apart from white. Thank you to MangoMikii for letting me know.
As mentioned earlier, I’ll be using the bun wig for this tutorial so for whatever wig you want to replace you want to find the file name in this file path:
C:\Users\[your pc’s name]\AppData\Roaming\Azahar\Dump\romfs\[acnl title id]\Item\Model\
You can copy and paste the file name from the cheatsheet guide above to easily find it in the Item > Model folder! 🙂

Getting Started
Firstly, open your desired model into CTRStudio, you can do this by opening it via File at the top or drag and dropping the file from file explorer into CTRStudio.

The UI will always look like this when you open CTRStudio with a model. Click on the folders to view more information about the original model.
You can right click drag to rotate the 3d viewpoint to see the model more clearly and left click the folders to view the model’s meshes, materials, textures and skeletons if applicable.

To export the model right click on the model and click on export. The model will always export as a gltf as default but you can rename the model’s name at the end to change it to a .glb, .dae or a .json file type.
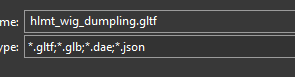
You’ll also be needing a dummy head for viewing your custom hairstyle properly in blender, you can grab it from this file path:
C:\Users\[your pc’s name]\AppData\Roaming\Azahar\Dump\romfs\[acnl title id]\Player\head_mdl\

Follow the above steps to export the dummy head so you can use it in Blender.
Getting Started in Blender
When you open Blender you always be greeted to a camera, cube and a light in the 3d viewpoint, you can delete all of them before we begin.
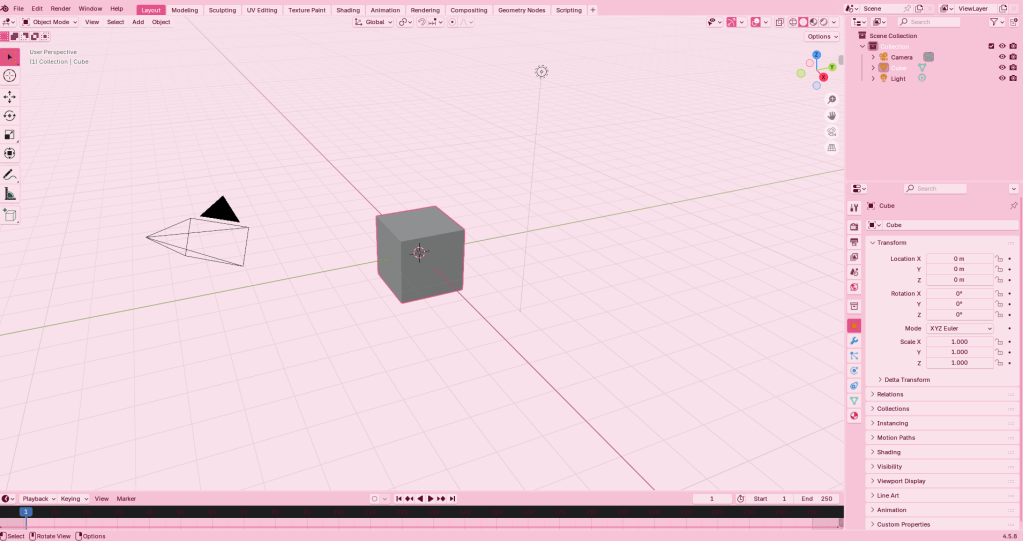
To delete anything in Blender press the x key on your keyboard.
Next, drag and drop the files you’ve just exported from CTRStudio into Blender.

Make sure to import the dummy head into Blender too!
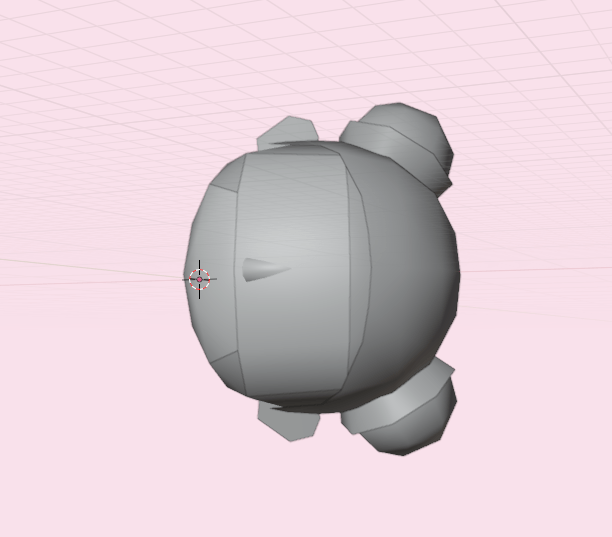
Before we rotate the model, let’s look at our scene collection first.

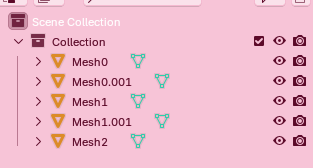
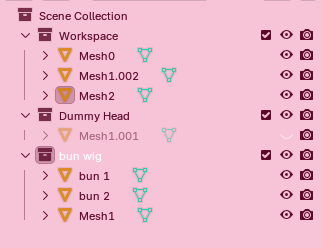
We’re going to delete that glTF_not_exported scene and the icospehere below it first. Delete both of them using the x key on your keyboard. Next we’ll be deleting those armatures. Once that’s all taken care of your scene collection should look like this:
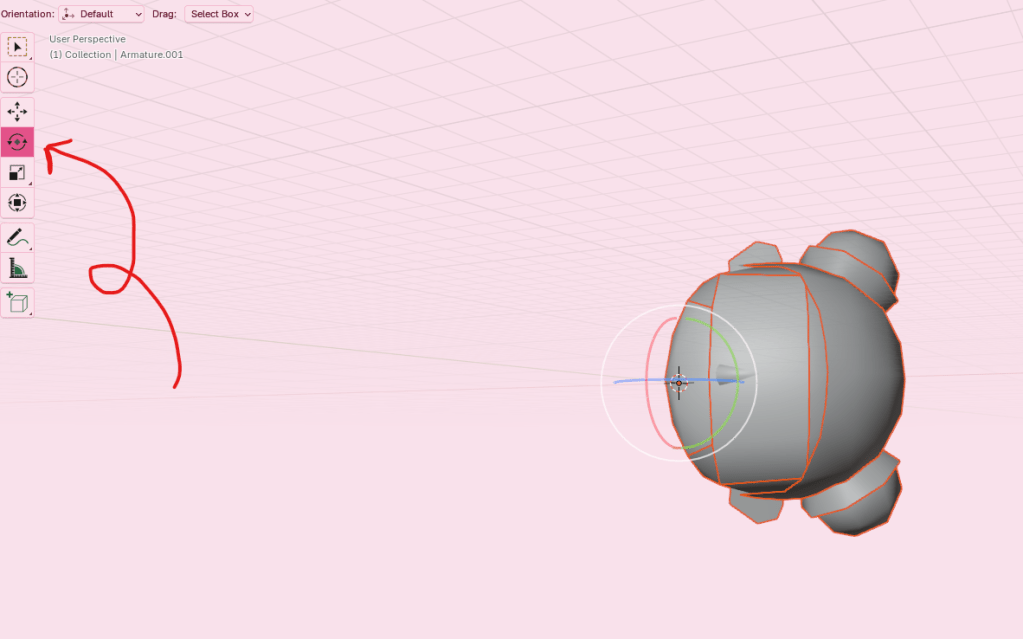
After that, we’re going to rotate the model -90 on the Y axis (green). Press A on your keyboard to select everything and then press the rotate button on the far left of the 3d viewpoint to open up the rotate menu.
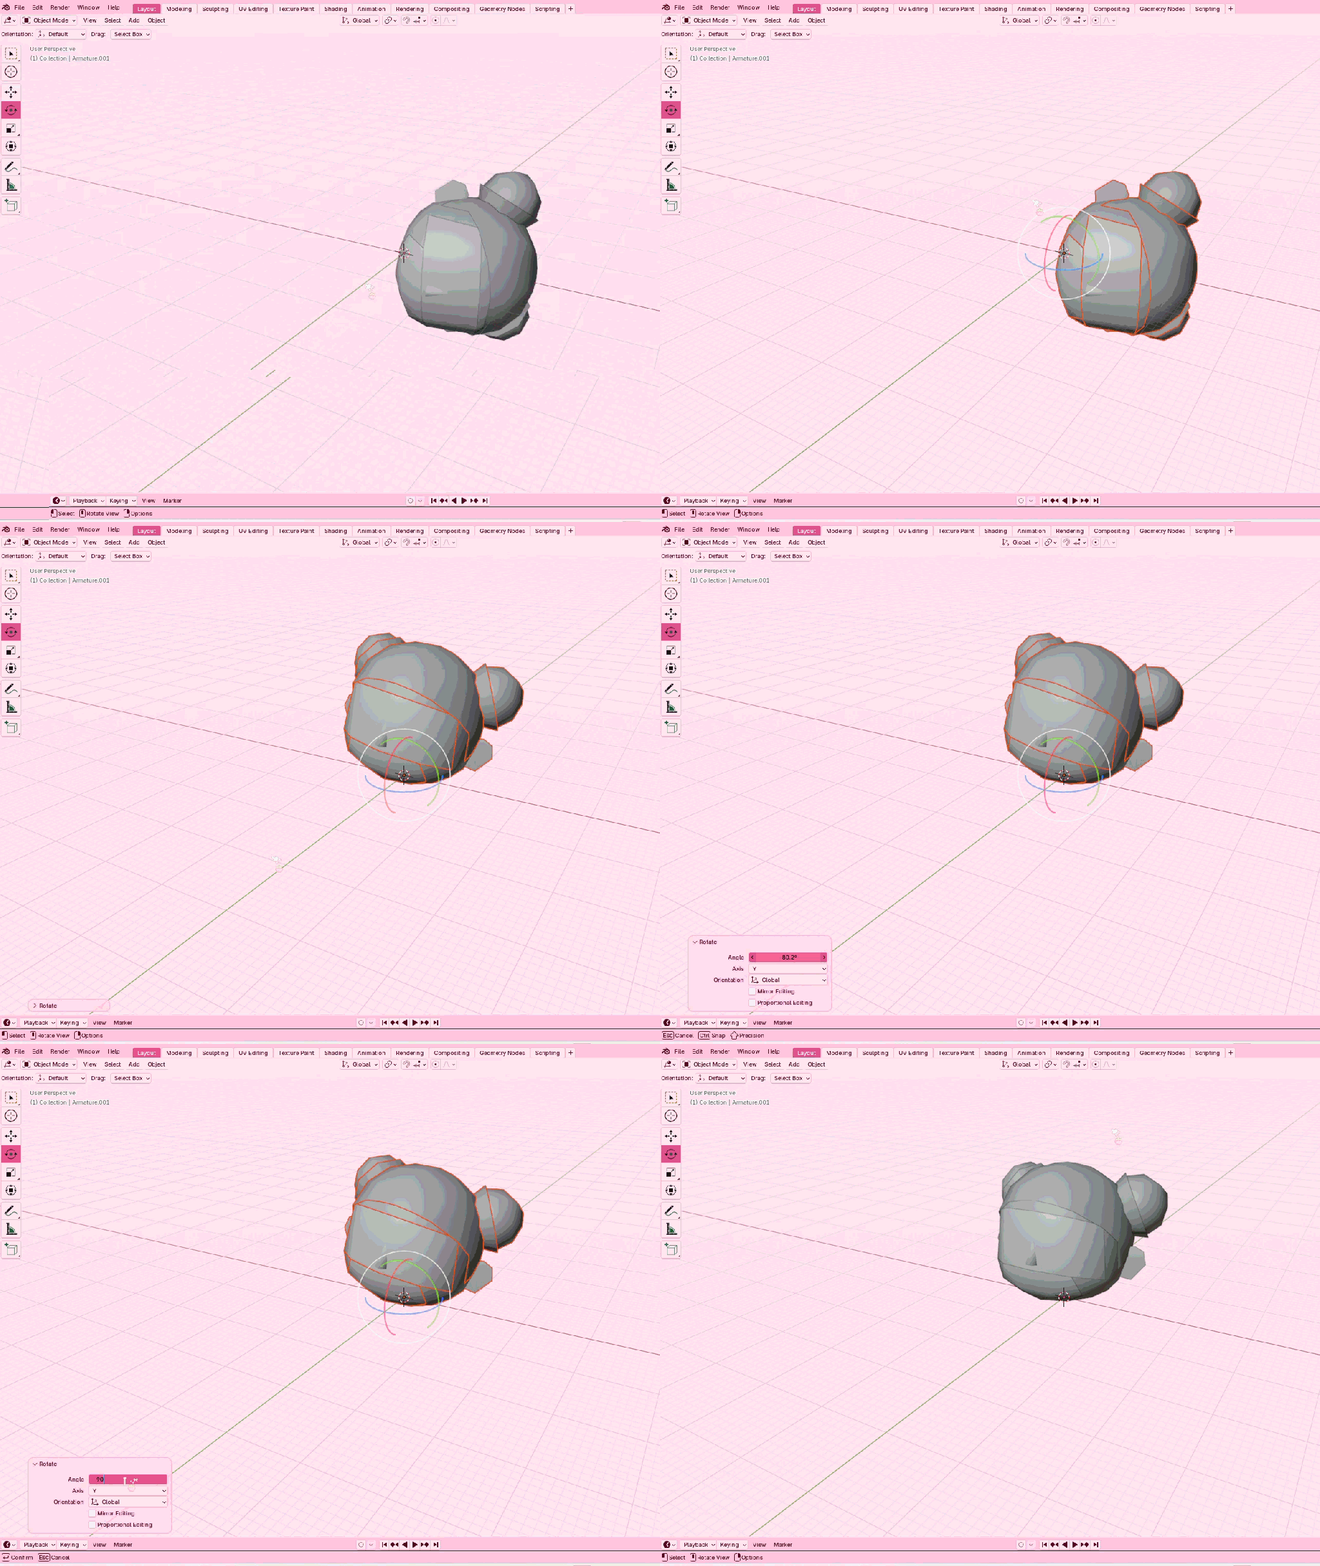
There will be a rotate section that opens up on the bottom left corner of your screen, type in -90 there!
I like to organise my workspace in Blender to keep things nice and tidy whilst I work so I’ll be showing you that too!
Let’s return to the scene collection space on the right section of Blender to organise our mesh so that we know what’s what because it currently look’s like this:
I like to make a seperate collection for my dummy head model so that I can hide it to check on my triangle count. To make a new collection right click within that scene collection space in the top right corner and select on new collection. Name it to whatever you’d like!
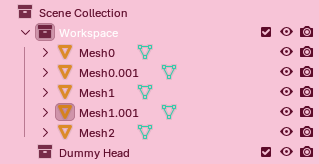
Now all you need to do is find out what mesh belongs to the dummy head, I like to merge those meshes altogether as one mesh but you don’t need to if you don’t want to! If you want to merge mesh into one you select the two meshes and then press Ctrl + J. After that just drag the dummy head mesh into the dummy head collection space!

It’s so much more tidier and oragnised now. 🙂
Next before we start the fun part you’ll want to enable stats in your 3d viewpoint. Why? Because the 3DS and your models have the dreaded tri limit.
For wigs it’s usually around 300 tris but sometimes it can be less than this. A general rule of thumb is to see how much the original model is so you know what the “safe amount” is, but in general terms any mod you create for wigs should not exceed 300 tris otherwise you may experience your game crashing when equipping the wig in-game.
To turn on stats for your 3d viewpoint navigate to this section with two circles overlapping each other and enable it. It can be found underneath text info.
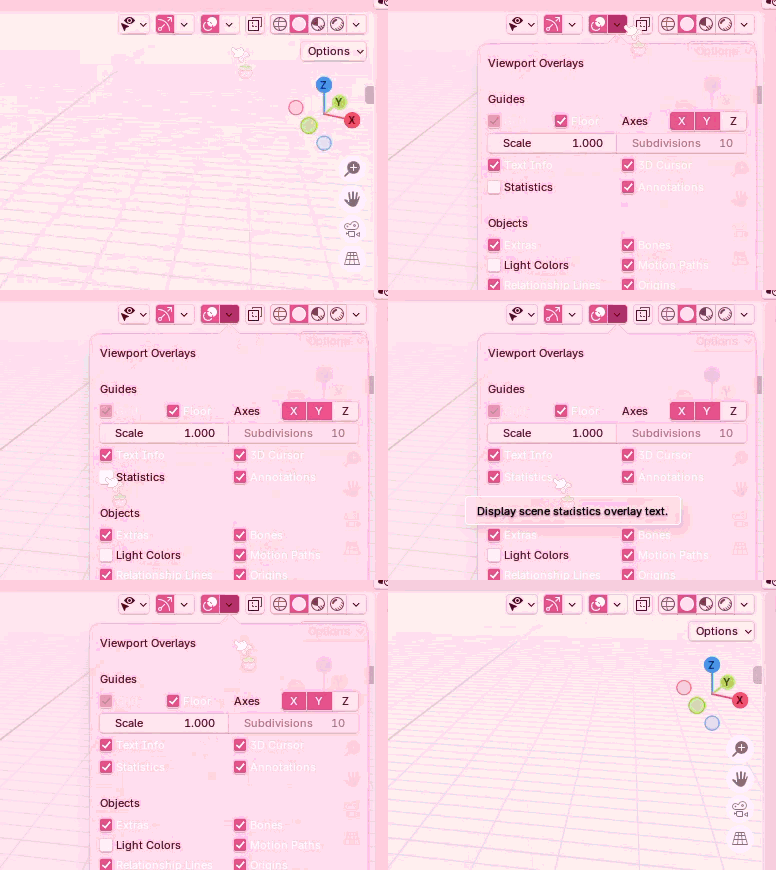
And to see how many tris the original model is you’re going to want to hide the dummy head. You can do this by clicking on the eye button the scene collection.


After that’s done you’ll be able to see how many tris the orignal model is at, the bun wig is at 244 tris.

Remember to unhide the dummy head after you’re done seeing how many original tris there are! I like to hide the dummy head often to check on the tri count to make sure it’s not above the limit.
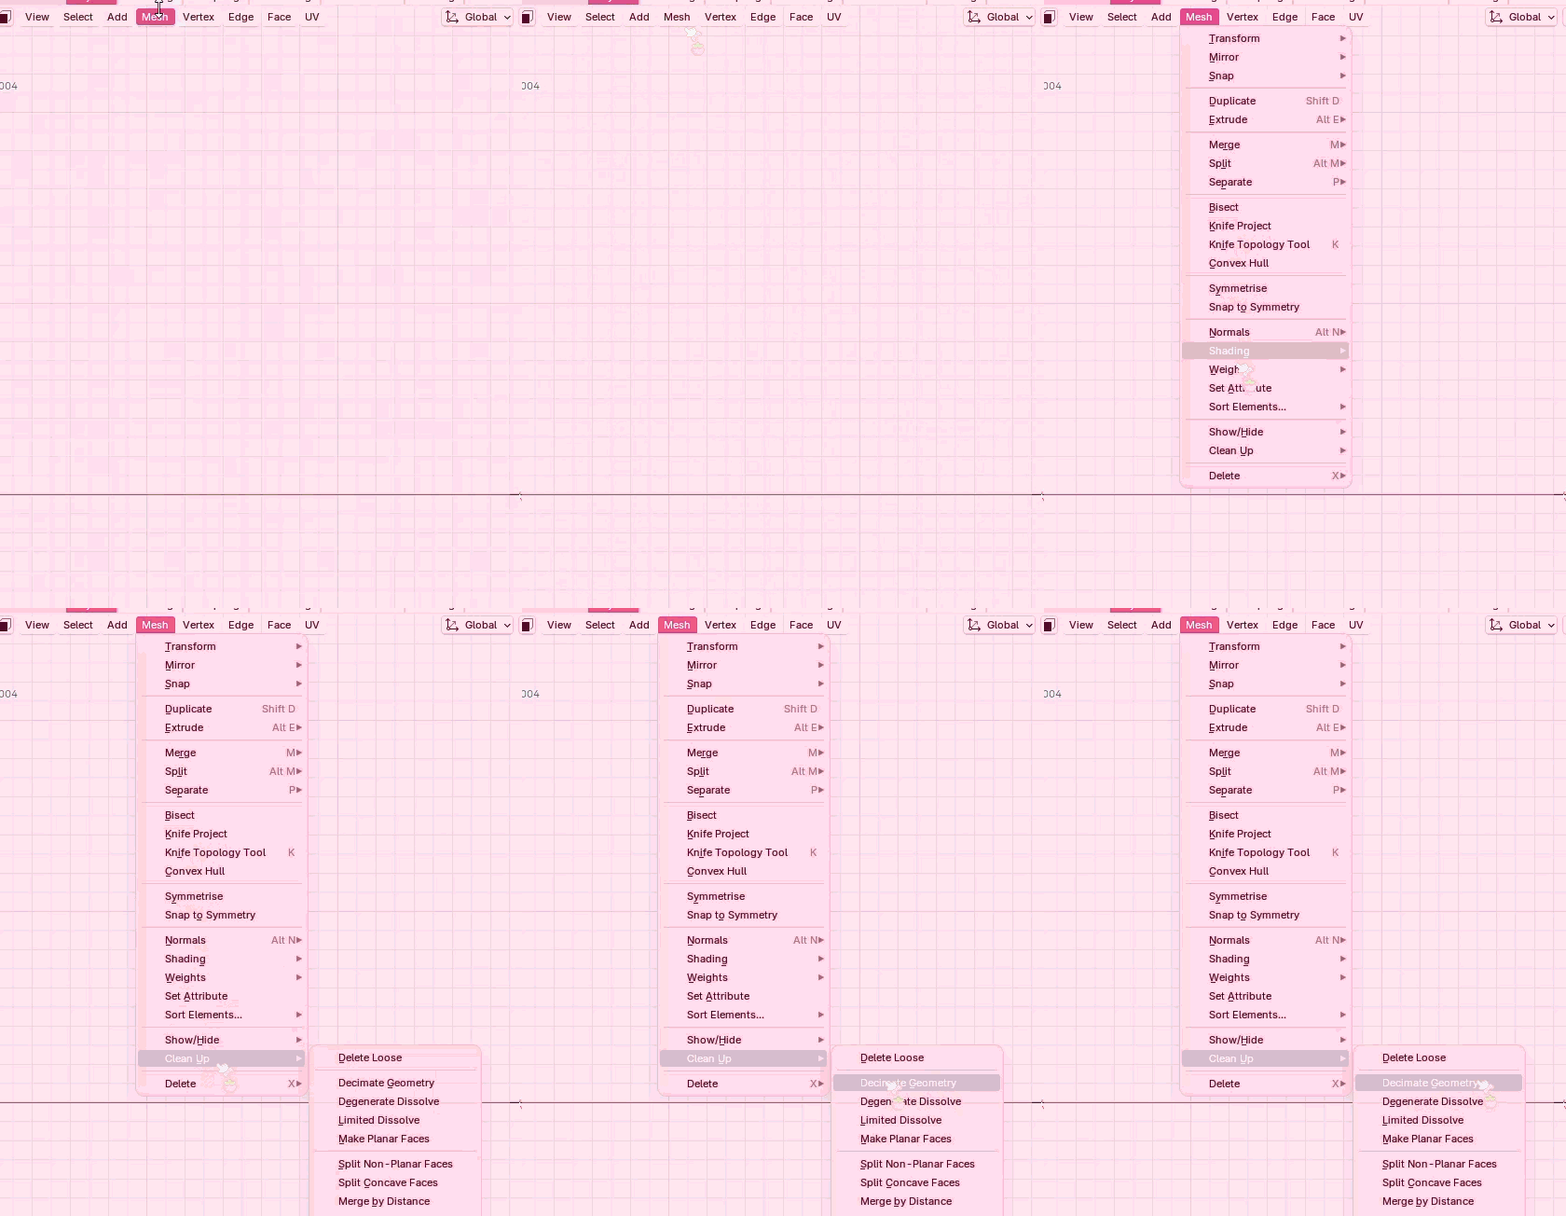
If your model is above the limit you can decimate your mesh by going into edit mode > mesh > clean up > clean up geometry. You can also use the subdivide and the decimate modifier in Blender to lower your tri count.
Making a Hairstyle/Wig in Blender
I will not be going into depth on actually making a full on hairstyle/wig from scratch in Blender because there are hundreds of hairstyles but I’ll be using a hairstyle I’ve made recently and me modifying it as a part of this tutorial still!
I’m going to recycle these buns from the bun wig to add onto a hairstyle I’ve made previously!
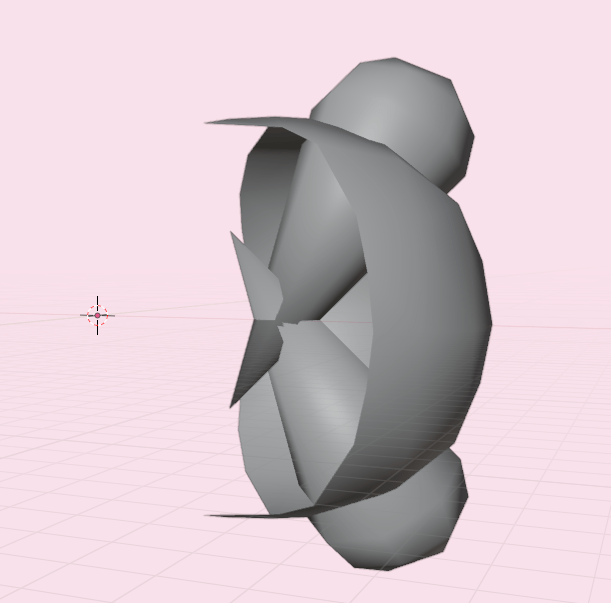
We can do so by going into edit mode (press TAB) and selecting only the buns. To do so, hover your cursor over the bun and press the L button – this will select the mess and we can seperate it using the P button!
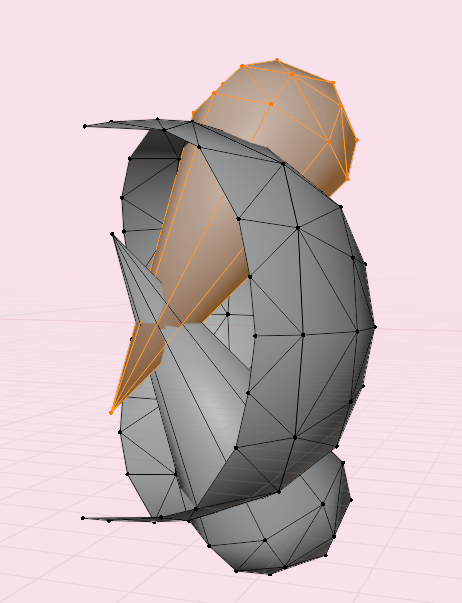
I’
l’ll be rinsing and repeating for the other bun too! I like to rename it in the scene collection to organise it again! So everything is neat and tidy.
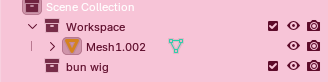
I’ll be deleing the base of the bun wig now as I no longer need it. You always delete selected mesh/objects using the x key on your keyboard.

I’m already happy with the placement of the buns for this wig but if you want to move them you can use the G key to free hand the movement or press G + (your chosen axis, X/Y/Z) to move them along an axis for more precise movement.
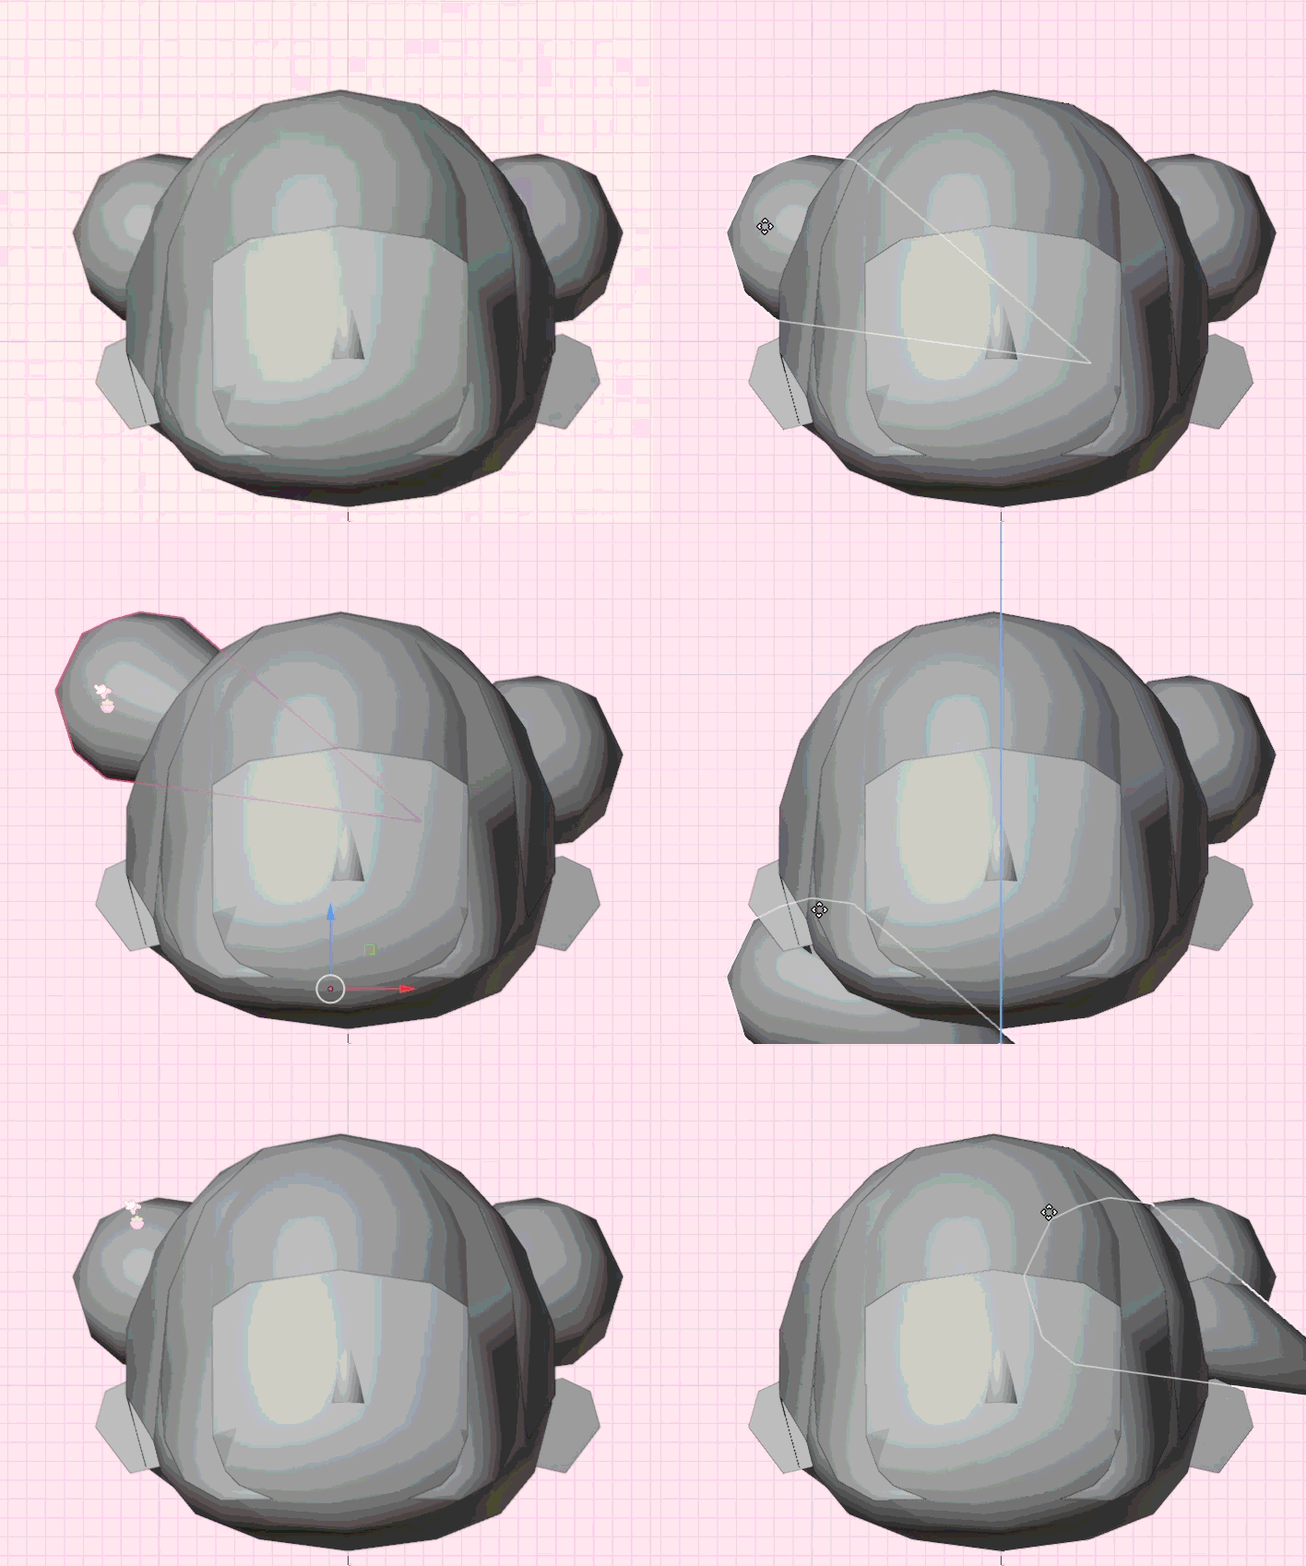
Once you’re happy with your hair you’ll need to rotate it back 90 on the Y axis. This is because it’s the original placement that the 3ds uses to load in the models, that’s why when we loaded the model into CTR and into Blender it always already laying in that position.

Once that is done make sure to delete the dummy head and merge everything altogether unless you want stuff seperate – for example an accessory (like bows). For my example, there is no hair accessory so I can merge all of the mesh altogether as one.
Next, you’ll need to export your model as a .dae file. It needs to be a .dae file that’s why you need to have an outdated version of Blender as dae exports are now considered legacy and no longer included within new build release versions of Blender.

You export via File and it’s just below the import part.
Returning to CTR Studio
Once you’ve exported your model we’ll be returning to CTR Studio, make sure to have that file open from earlier (the one you exported OR the one you wish to replace – in this case it’s the bun wig so hlmt_wig_dumpling.bcres).
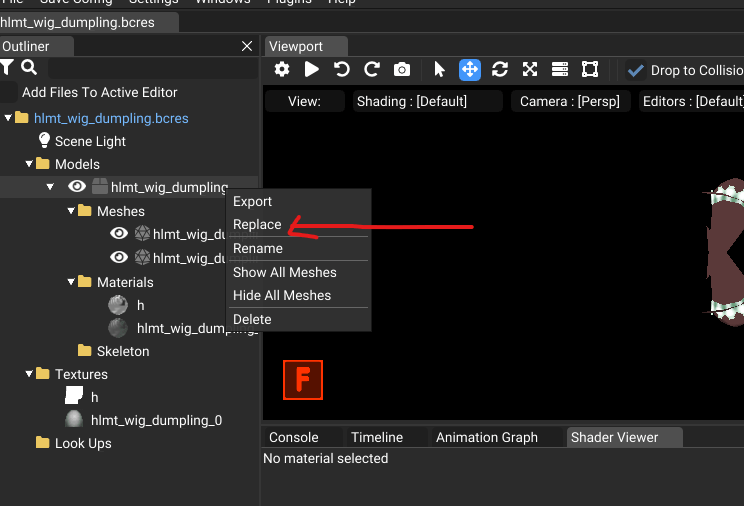
Remember how we exported the model earlier in CTR? Now we’re going to do the opposite of importing a .dae file. Right click on the model in CTR and click on replace to import the model you’ve just made in Blender.
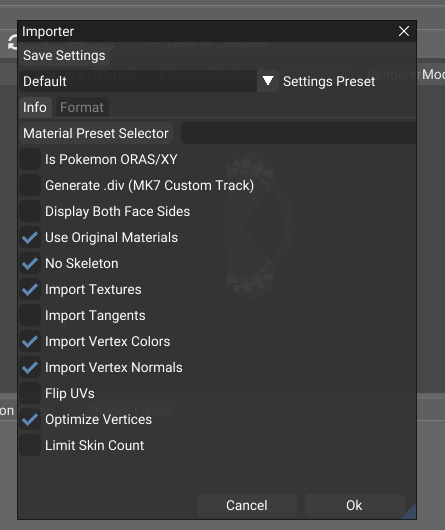
Whenever you replace models in CTR it’ll always do this pop-up for settings. You can mess around with them if they’re necessary to whatever you’re making but for this tutorial they’re not so I’m ignoring it. 🙂
Most of the time your mesh might look like this in CTR Studio, this is a very simple fix though!
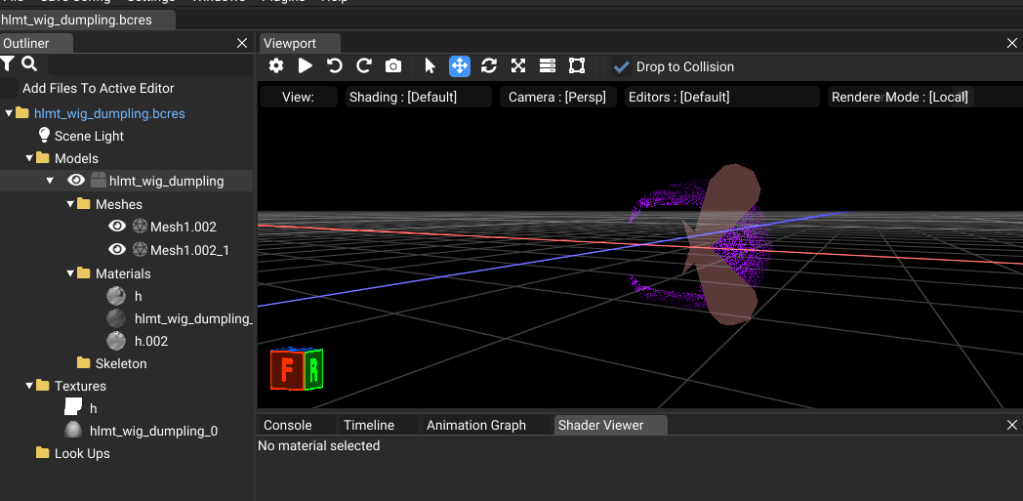
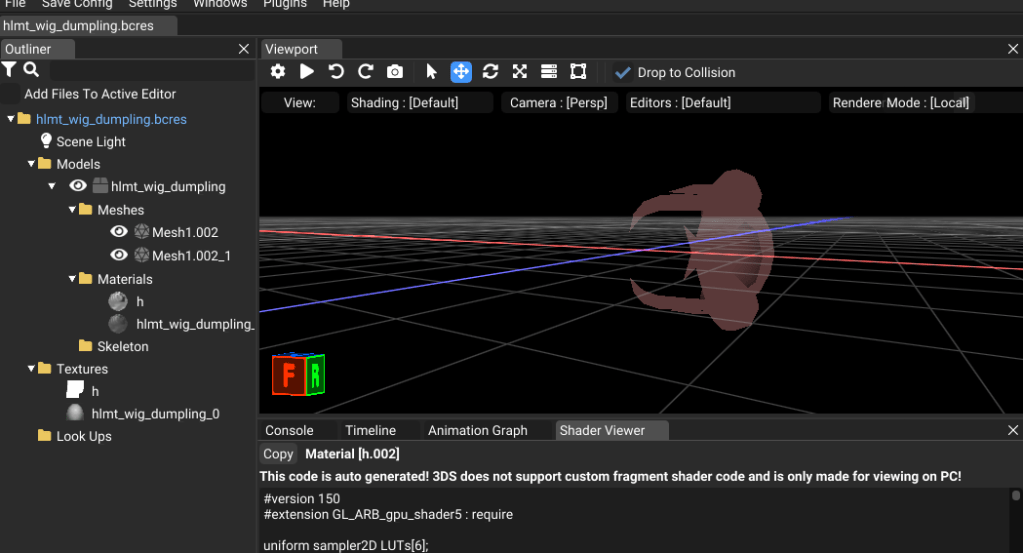
To fix this, delete whatever new material pops up. In this example you can compare both the above screenshot and the screenshot from the start of this tutorial to see what needs to be deleted – it’s the h.002 material!
To delete it, right click and press delete and as you can see, it fixed my model! But we’re not done yet anyways.
Now we’re going to be doing some last fixes in CTR which is to do with the model’s materials – always turn off BackFace for the polygon info’s face culling.
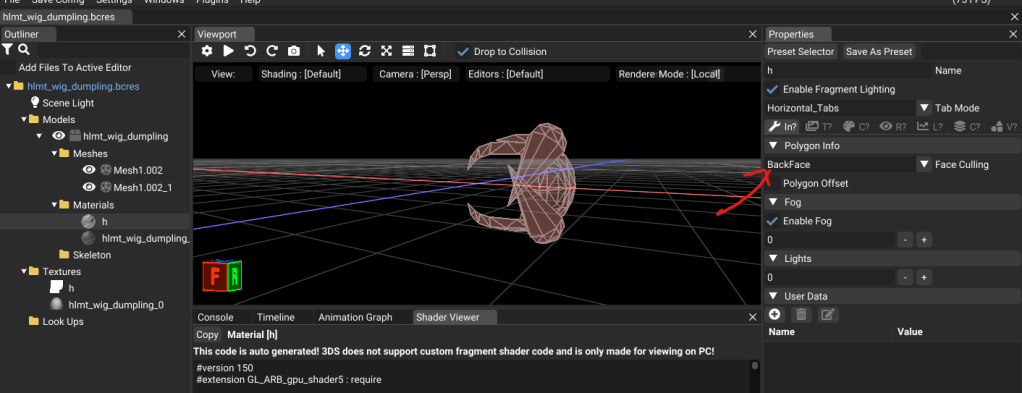
I always set it to “Never”.

Next we’ll be turning off the vertex colour intensity as this will make the model glow in the dark, unless you want glow in the dark hair this should be always turned off.
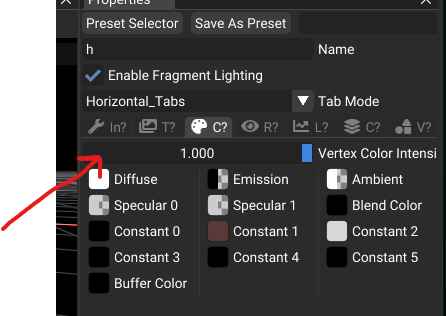
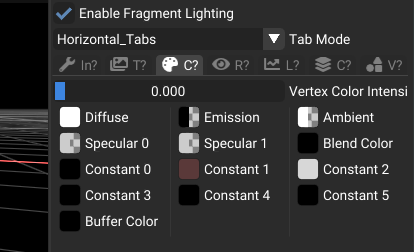
Make sure to also fix your hairstyle’s rendering from transparent to opaque in case it is set to that by default.
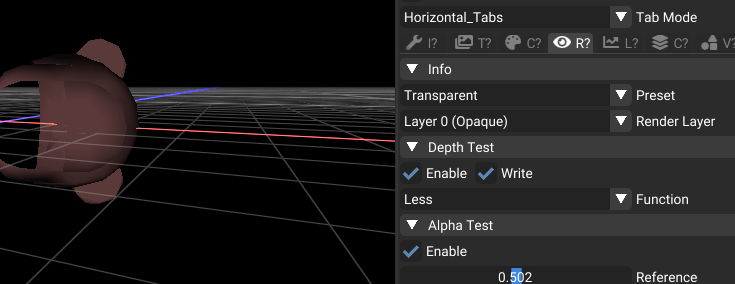

Rinse and repeat this for the other materials if there are any for your hairstyle mod! Once you’re all done then you need to test the model in game!
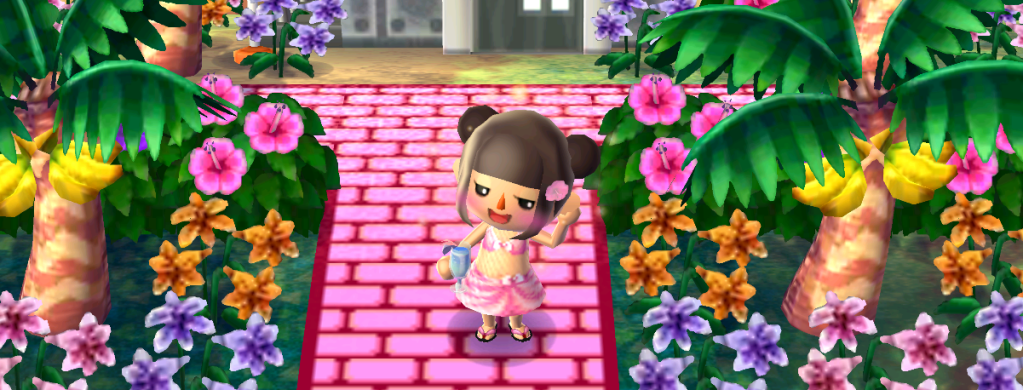
How to Use The Mod
After creating the mod you’ll need to set up a mod directory to make it work on either your emulator or console. This is very easy and won’t take more than 30 seconds at most to do.
Rememeber how you found your file that you edited in the first replace? We’re basically going to create that exact same directory now.
First, create a RomFS folder called “romfs”. It needs to be in all lowercase to work.

For this next step it will depend on what specific file you edited, because this tutorial is based around wig mods it will only be romfs > Item > Model but if you’re following this tutorial for any other custom 3d model it will be the directory that you found the original model you’re replacing/editing.
To make it simplier: I edited the bun wig during this tutorial. The file was found in romfs > Item > Model so because it was found there, we will be creating that exact same directory layout.

There should only be your mod inside of this folder unless it’s a public works project or whatnot that is related to the mod.
After creating that directory you’re finished! For information on how to install any texture mod you’ve made please refer to my written guide here. If you wish to learn how to make texture mods you can find a written guide on how to do so here.
If you need any help at all in terms of this guide or have any questions at all feel free to reach out via my Tumblr “ask me anything” or via my Discord server.
You can also watch me make ACNL wigs/hairstyle mods on my YouTube channel too! They are sped up by 5x speed but feel free to slow the videos down if you’re more of a visual learner. Here’s an example:


incroyable j’adore ce que tu fais xD
LikeLiked by 1 person
Thank you! 🙂
LikeLike